Notifications and how to set them up
Notifications will let you know a variety of things to help draw your immediate attention and help you remain on track - we’re strong believers in keeping your email inbox as clear of non-critical updates as possible, so make sure you keep an eye on Notifications and User Mentions
We’re all used to ‘bell’ icons these days, sometimes they’re super useful, sometimes they can feel unnecessary and eventually, you ignore them!
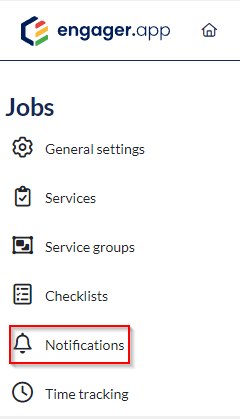
So let’s tell Engager what we do and don’t want be notified about - let’s head to our Settings - Jobs - Notifications
First up, how long do we want to keep these Notifications hanging around for, so select something that works for you. Typically 30 days could be a good amount of time to have them appear before the system removes them.
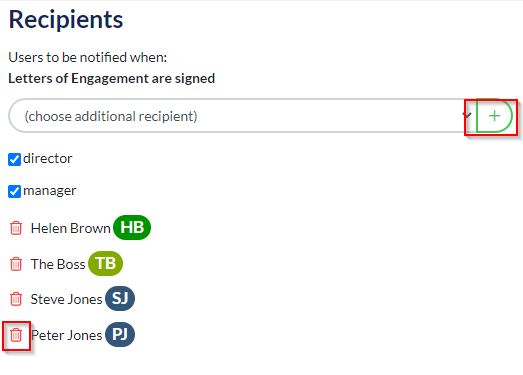
Now for the fun bit, WHAT do you want to receive the Notifications to tell you about and WHOM do you want to Notify
Letters of Engagement Signed - Yes absolutely, big win for the company and now let’s fully onboard the client - get that done asap! BUT, does everybody need to know? This is where you can tailor who gets the Notification - we’ll automatically add in the Director and Manager for ALL Notification events, but you can remove them if you need.
If you want to Add, you can use the drop down and select a team member and to remove, simply select the Trashcan to Delete
Notifications are typically system based items, so signings, documents sent out / received or forms received - they are not you or a team member being tagged, this is a User Notification which sits just next to your Notification

User Mentions
Need to chase a member of the team for an update? Stuck with a tricky Self Assessment and need your Tax Expert to review? This is where the power of User Notifications comes into play
You can mention a User either by Services or Tasks
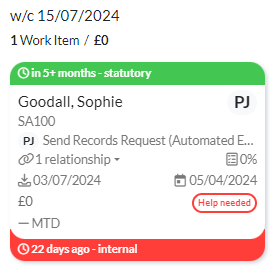
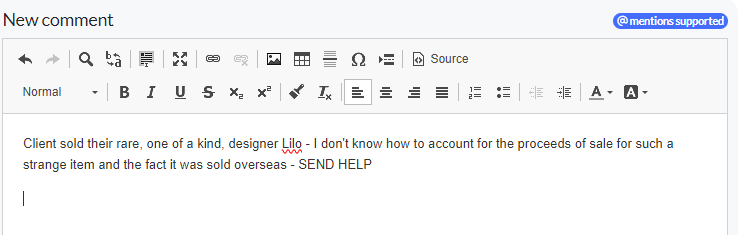
In this example, I’ve been working through a Self Assessment and I’m stumped - I’ve marked my job card as Help Needed so I know where I am with the work
When you enter into the job card, you can scroll down and select ‘new comment’

Enter in the issue
Then select @ to then tag the relevant team member - in this case, the Boss
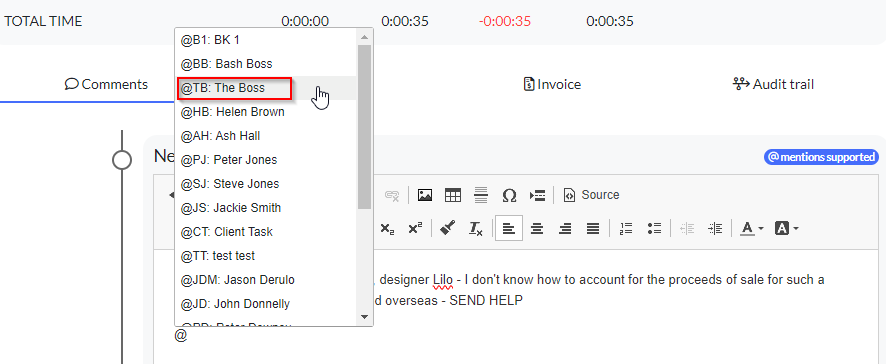
This will immediately flag to the Boss that I need help to move on
The Boss will now have a User Mention flag up on their top bar and in BLUE to signify that it is NEW

When the BOSS clicks into the mention, it will take them directly to the item required for them to act accordingly. If they need to come back to that Mention, they can re-mark the Mention as Blue again, and action later on
Custom Fields
Custom fields are incredibly powerful and useful - think of them as an item that you can interact with on the system, to trigger events or include as placeholders within emails (Placeholders are like your mail merges)
We recommend watching our tutorial on these as there’s a lot you can do with these fields and they will help tailor your Engager experience to match your Practice even more - https://help.engager.app/hc/en-gb/articles/18598118248466-Using-Custom-Fields
For a quick overview, here’s a quick example of how you could use a Custom Field.
In this example, I want to adjust my Self Assessment default pricing for a proposal, because the prospective client has self employed income as well as their salary and dividends. As the self employed income is outside of our standard Self Assessment pricing, I’m going to adjust accordingly
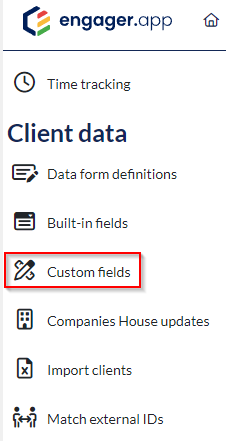
Head to your Settings - Client Data - Custom Fields
This is where you can start populating these fields and entering in questions or information that you want to hold / ask the client
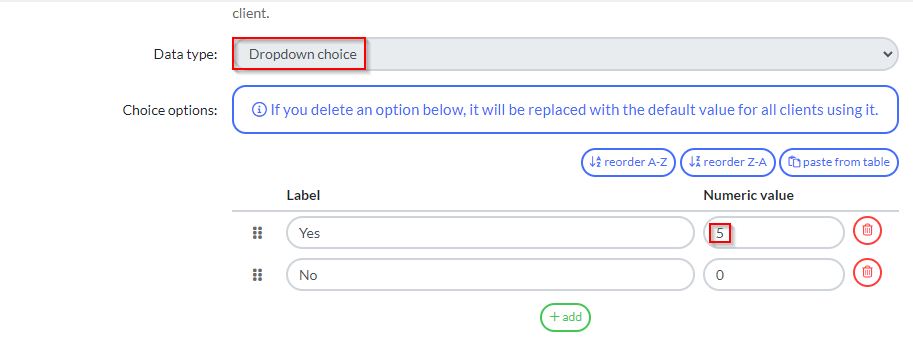
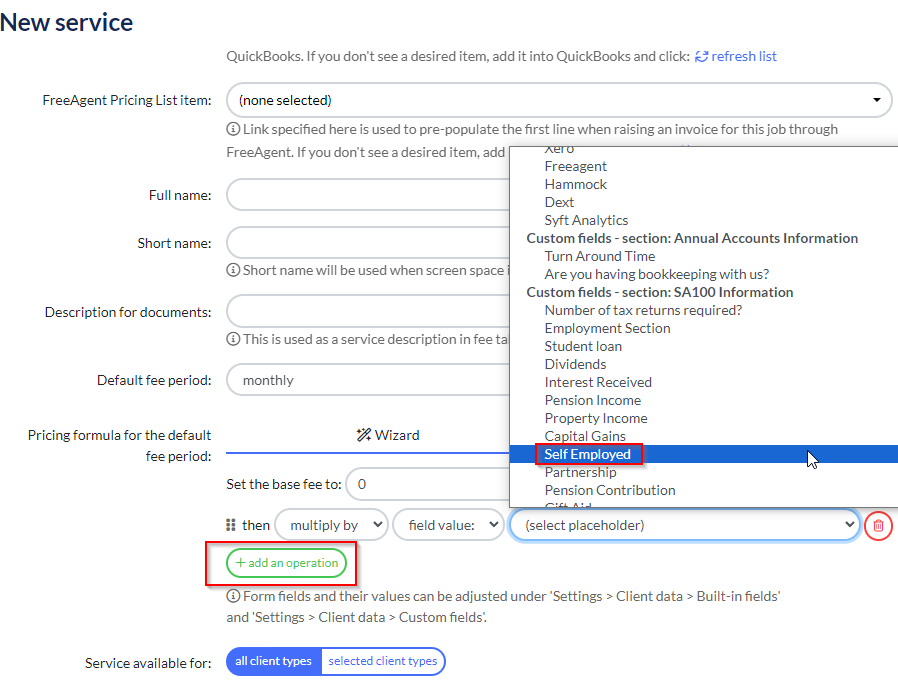
With the above example, I want to create a NEW Custom Field in the SA100 Information section - eventually, yours will look like this as you tailor Engager to match your practice’s needs

This is where you can start to program the behaviours that you want - so in this example, I want to charge 5 times the amount of my usual self assessment fee of £100, if they are self employed.
You’ll start to see how this all comes together in the pricing tool as well - if you ever get stuck with how something is calculated, head on back to your Custom Field and check how you’ve programmed the behaviours.
You can also play with some of the data values and types too so if you wanted to have a scenario in Bookkeeping as an example, and wanted to charge the customer for an average number of transactions to reconcile per month, us the Whole Number value and the system will calculate accordingly.
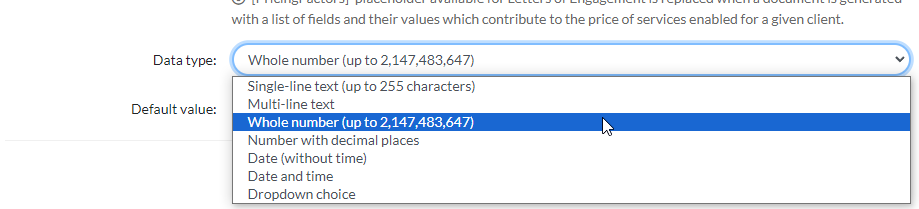

This could be your average number of transactions - enter this as your ‘Whole Number’ for that month x the Default Value being £0.15p
Once you’ve had a play with your Custom Fields, when you come back your pricing within the Service, you’ll see that you can select ‘Add an Operation’ then pull through your new Custom Fields to interact with - you can be as complicated as you like if you need to
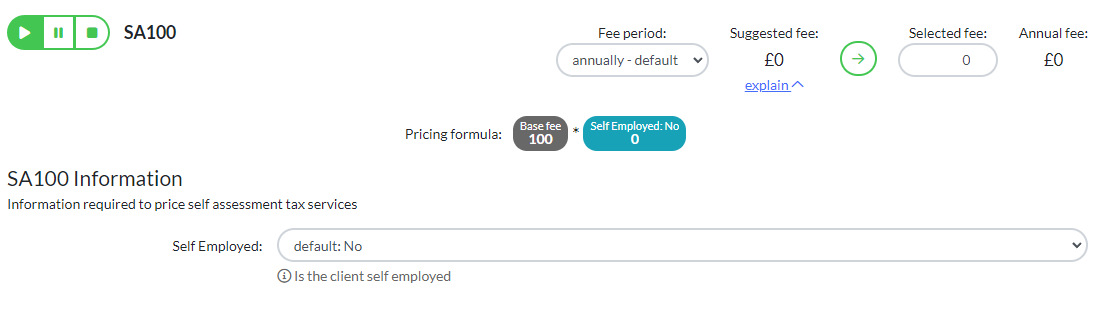
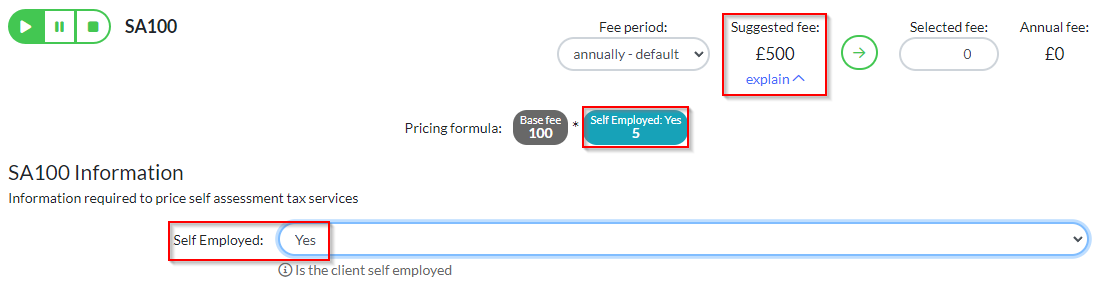
Then we you see all of the above come together, it will appear like this on your Services and Pricing page:
Before:
After:
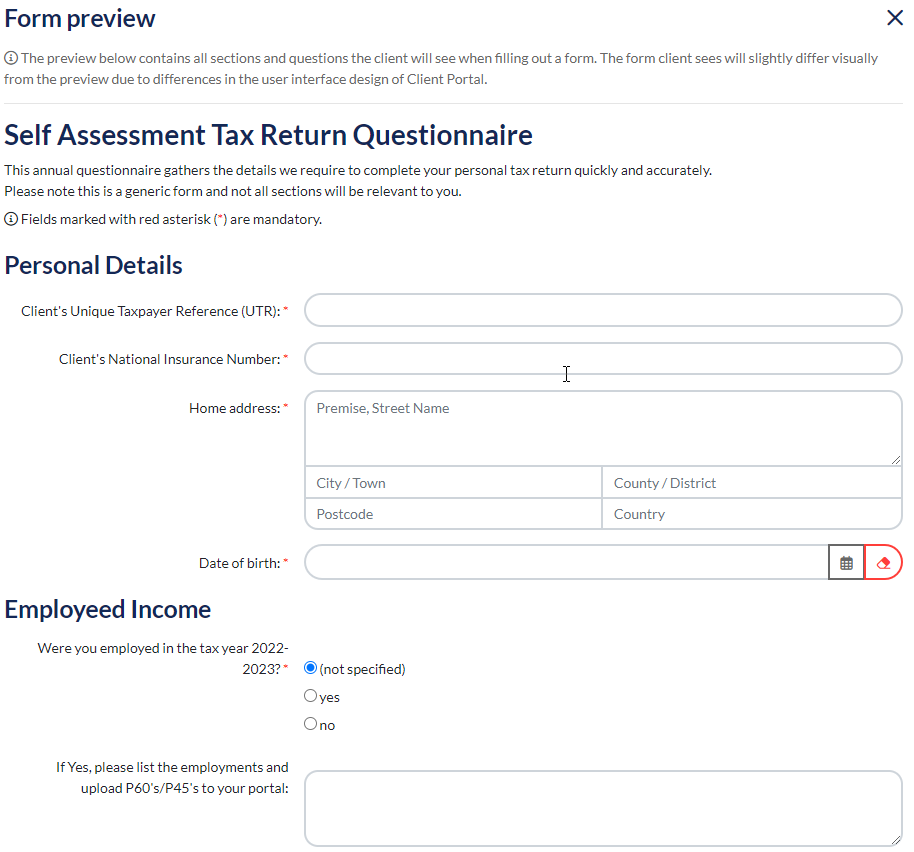
How to use Forms
Forms are a great tool to collect, review and save data from clients. We’ve also tried to make your start to life with Engager even smoother by adding in some of our own such as Self Assessment questionnaire and Onboarding forms for your new clients.
Key things to note about the power of forms - you can send these directly to clients and they respond via their portal, so nice and secure but also, the answers can be mapped and saved directly onto the client’s account saving you time having to copy and paste
Here’s an entire video about the subject or feel free to read on - https://help.engager.app/hc/en-gb/articles/18597471719314-How-To-Use-Forms
Here’s a preview of our pre-built Self Assessment Tax Return Questionnaire that we’ve made available for you to use - as with all things Engager, feel free to customise as you go