How to set up and use the Xero Intgeration
The Xero integration is £4 per month for all of your clients, not per client. It's a fee that is charged to us at Engager, so we have to pass this cost on
To start the integration, please head to Settings - Integrations - Select Xero
Click on Authorise Xero, this takes you to the Xero login screen and workflow - you need to select 'authorise'
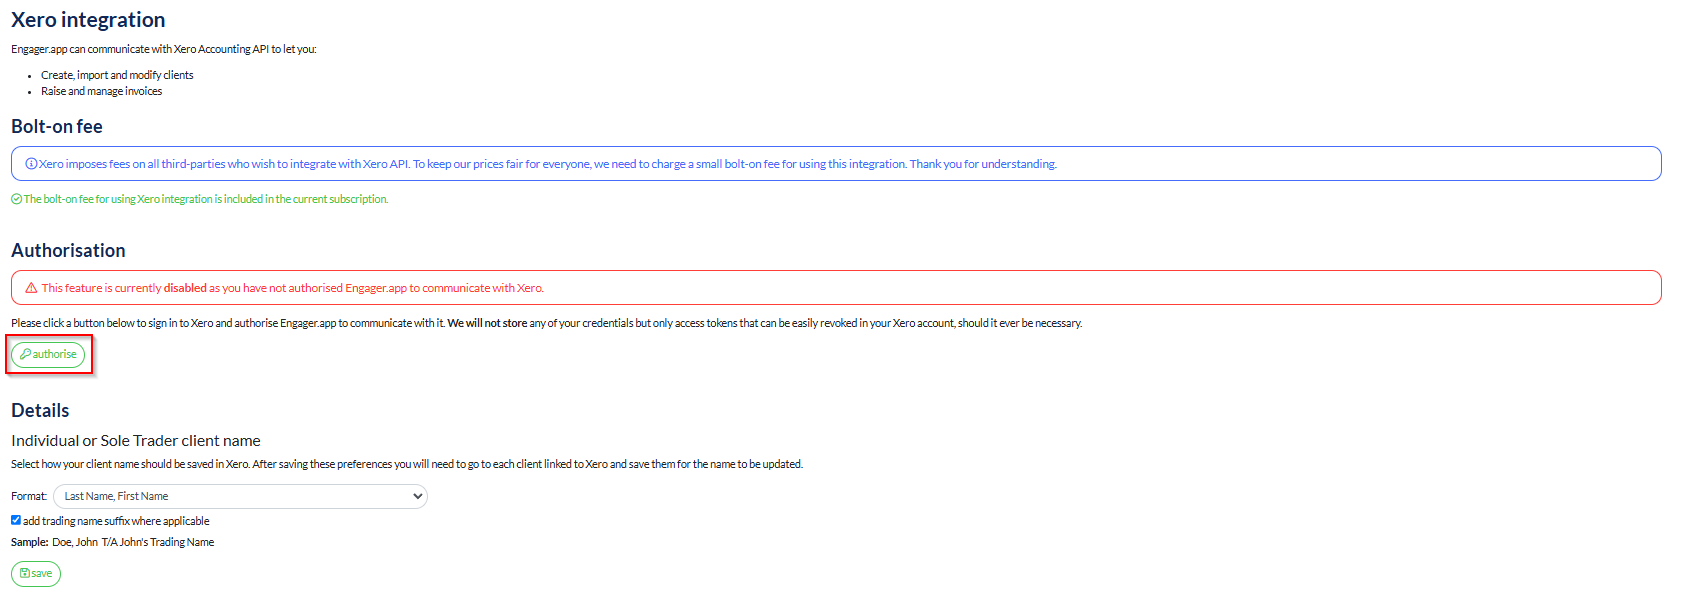
This should authorise the sync
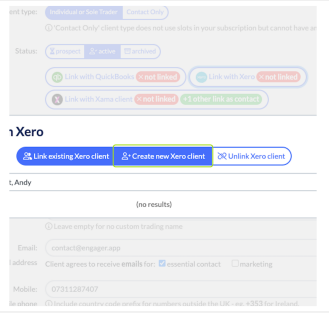
Then you need to LINK to your clients.
So head to a client that you know and know uses Xero
Then you need to LINK to your clients.
So head to a client that you know and know uses Xero
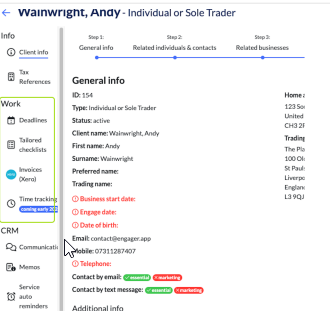
Remember, you're linking the COMPANY
, not an individual
, not an individual
Select 'Link with Xero'
Then decide whether you're matching, creating a new or unlinking mro6 Xero.
If linking you will search the Xero customer it'll look for a match, if adding a new record Client
Engager will create a new customer record in Xero and link to it.
Click on confirm to link or add the customer to Xero
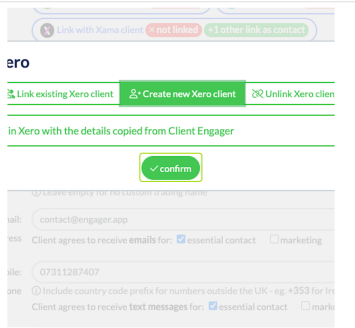
Click on confirm to link or add the customer to Xero
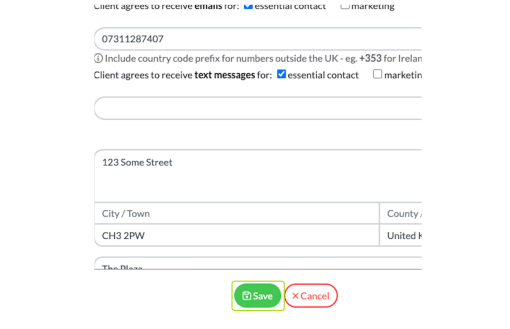
Click on Save
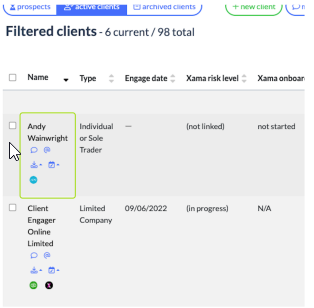
You will see from the client list if a client is linked to Xero record because there's now a Xero icon
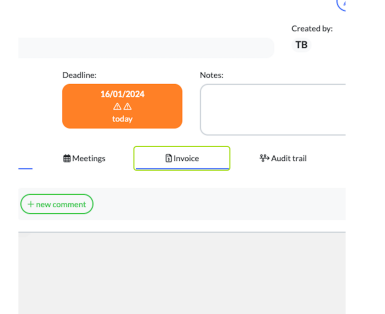
A new left-hand menu item will also appear where you can click to View the Customer's Invoice History
On entering the Invoice History View, you can create a new invoice that will be pushed to Xero via the API or CLICK to access the debtors report, which will open a new window and Xero
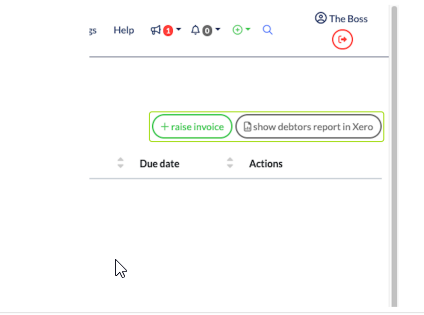
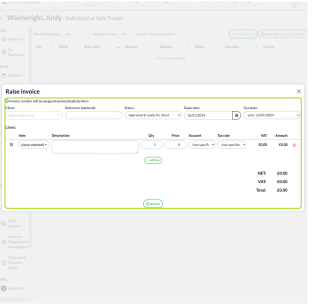
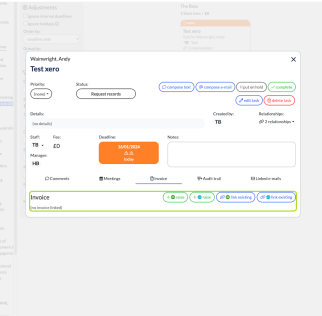
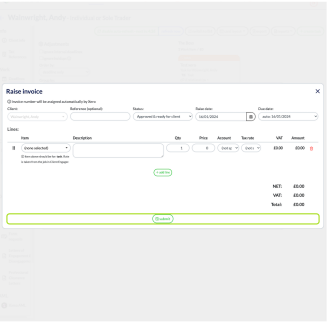
To raise an Invoice from Engager to Xero Click on raise invoice

Enter the Invoice data, the Invoice number will be assigned automatically by Xero
You can also raise or link Invoices via specific deadlines to do this Click on Jobs
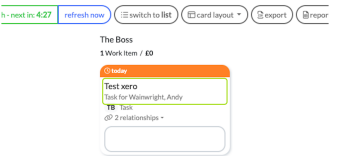
Click on Invoice tab
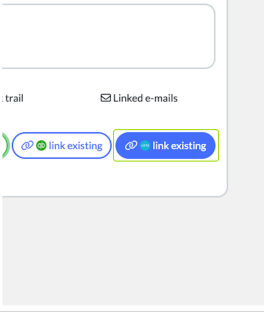
Click on the o:tion you require, link or add invoice
to create an invoice Click on raise
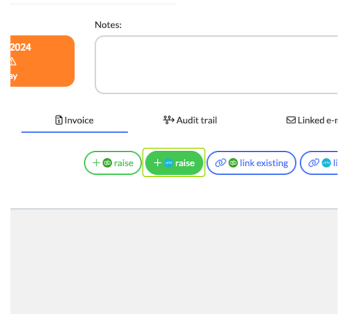
enter the details and Click on submit
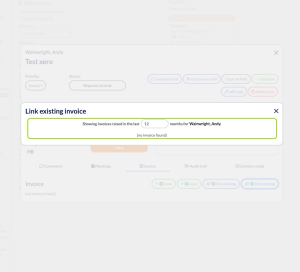
to link an invoice already in Xero Click on link existing
a list showing the last 12 months of invoices raised for your client will show and you can select the Invoice you want
From any screen you can select the invoice menu at the top menu by Clicking on Jobs
Click on Xero
You will see from the client list if a client is linked to Xero record because there's now a Xero icon
A new left-hand menu item will also appear where you can click to View the Customer's Invoice History
On entering the Invoice History View, you can create a new invoice that will be pushed to Xero via the API or CLICK to access the debtors report, which will open a new window and Xero
To raise an Invoice from Engager to Xero Click on raise invoice
Enter the Invoice data, the Invoice number will be assigned automatically by Xero
You can also raise or link Invoices via specific deadlines to do this Click on Jobs
Click on Invoice tab
Click on the o:tion you require, link or add invoice
to create an invoice Click on raise
enter the details and Click on submit
to link an invoice already in Xero Click on link existing
a list showing the last 12 months of invoices raised for your client will show and you can select the Invoice you want
From any screen you can select the invoice menu at the top menu by Clicking on Jobs
Click on Xero
This View will then appear
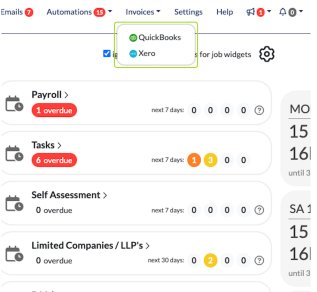
We also have have a widget summarising the debtors report in Xero
Related Articles
How to use the Automations
Automations in Engager.app are a powerful tool designed to help you manage routine tasks efficiently, allowing you to focus more on strategic activities within your accounting or bookkeeping practice. This guide will walk you through the basics of ...How to use Texts, SMS Messages
At Engager, we’re here to help you run your business efficiently while providing multiple ways to contact your clients. We’ve created automated reminders for you to use and chasers which could be triggered on a weekly or even daily basis - BUT - For ...How to set up the client portal app via QR code
Step-by-step guide Step 1 After the account is set up, log into the Client Portal on another device, such as a computer or a tablet. The login screen will look similar to the attached screenshot but will contain the logo or practice name of your ...How to use Xama and Engager for AML Checks
Do you struggle to stay on top with your AML checks for the company and personnel? Worried that these things might slip? This is where having an integration with a leading AML expert comes is ideal - let them do the heavy lifting so that you’re free ...How to Use Automations in Engager.app to Streamline Your Practice
Automations in Engager.app are a powerful tool designed to help you manage routine tasks efficiently, allowing you to focus more on strategic activities within your accounting or bookkeeping practice. This guide will walk you through the basics of ...