How to manage folder structures in Client Engager
In this video we look at how to manage your folder structure in Client Engager there's also a step-by-step PDF guide
Folder Templates and Structures
This is where you can set what folders you will need per client type, so folders for Self Assessment clients and folders for LTDs
You will see 3 options Read, Write and SubFolder. The most import of these is READ when it is Green as this denotes that your client can SEE the document in their client portal
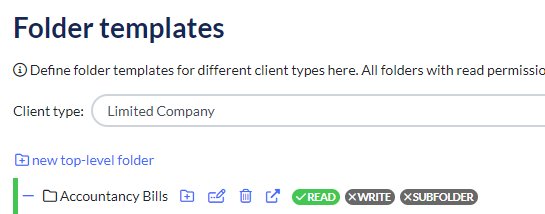
If WRITE is green, it means that your client can interact with that document, they can read, and upload their own documents to that folder - handy
Remember that if you hold documents such as working papers, for your client, you can keep these hidden in a Subfolder - don’t mark it as Green as the clients can see your workings. If there’s anything sensitive also, make sure the folder remains grey
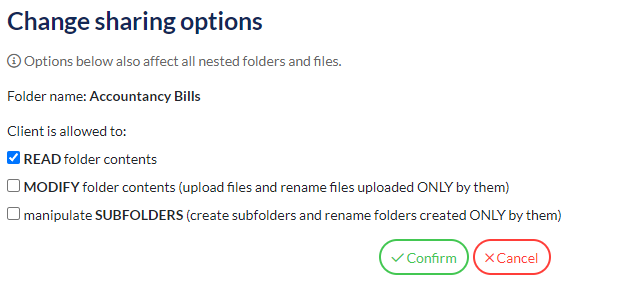
It’s very quick and easy to change these permissions by selecting the ‘change sharing options’ icon

From here you can amend the options accordingly
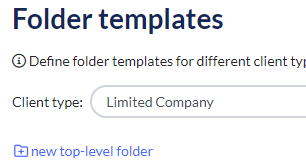
If you want to ADD a new Folder and additional nested folders within, simply select ‘New top-level folder’ name accordingly, then select the ‘Add nested folder’

Related Articles
How to manage client records
In this video we take a look at client records and and overview of the tools and features designed to help manage client records in Client EngagerHow To Manage Emails In Client Engager
We know that it’s often difficult juggling a busy practice with numerous staff members all operating on different apps and software so we’ve developed a way to bring all of your communication together into one space within Engager. With Engager, you ...9 of 10: Maximize Efficiency with Portal Customization and Automation
Elevate your client experience with a customised portal and streamline your tasks with automation. Learn how these tools can transform your practice's productivity and client engagement. Lastly, we recommend you to navigate to 'File Name Templates'. ...Getting ready for MTD IT and how to manage within Engager
MTD is coming and there's no avoiding it now! But don't worry, we're here to help you manage the process effectively and keep you as compliant and organised as we possibly can! Following our practical guidance and steps, you'll be up and running in ...Overview of Client Engager
There's so much that Engager can do for you and your company, and in the video below, our very own Johann, will walk you through the key features from Deadline Management, your Dashboard, letters of engagement, email management, tasks and many more! ...